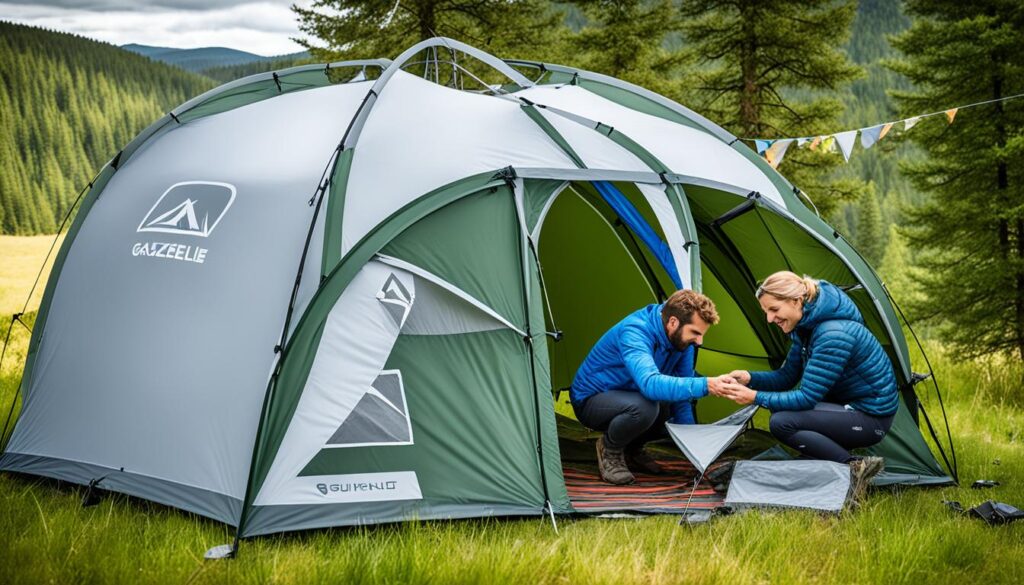
Did you know the Gazelle Camping Tent comes with an impressive1 12 parts? These include everything from a detachable rain fly to tie-down ropes and ground stakes1. This detailed design makes setting up your tent fast and easy. It’s perfect for both experienced campers and those new to tent camping. Follow this easy guide to get your Gazelle tent ready for your next outdoor trip.
Introduction
Setting up a tent can be tough, especially for beginners. But, the Gazelle Tent makes it easy with a simple setup. It turns from a compact bag into a strong outdoor shelter quickly2. This guide will walk you through the Gazelle Tent’s main features and how to get your camping tent pitching ready.
The Gazelle Tent is a favorite among outdoor lovers for its easy setup and durability2. It has a peak height not specified and can fit up to four people2. At 31.8 pounds, it’s light enough to carry but strong enough for outdoor shelter assembly and Gazelle tent setup.
Whether you’re a pro or new to camping, the Gazelle Tent’s design and instructions make setup a breeze. You’ll quickly turn your campsite into a cozy and portable temporary shelter3. Let’s explore what comes in the Gazelle Tent package and how to set it up for your next adventure234.
What’s Included in the Bag
Buying the Gazelle tent gets you everything you need for a great outdoor trip5. You’ll find the main tent, a rain fly, floors, gear lofts, ropes, stakes, and a storage bag5. These parts come together to make a full outdoor shelter for up to four people6.
Essential Components
The Gazelle tent’s core includes two long poles and one short pole for the vestibule6. These poles support the tent and make the entryway6. You also get ground stakes, a storage bag, and ropes, making sure you have all you need for setting up4.
The Gazelle tent has everything you need for a comfy and secure camping trip564. It’s perfect for a weekend away or a longer outdoor adventure.
Before You Begin
Getting ready for your outdoor trip with the Gazelle tent starts with picking the perfect campsite. Look for a spot that’s flat and free from debris to keep the tent safe from damage7. Make sure it’s not under any trees or other things that could fall on you, especially in bad weather8.
The Gazelle 2-room tent is easy to set up and take down, even with the floors on. But, it’s smart to remove the rain fly and gear lofts before you pack it away7. This makes putting up and taking down the tent quicker and easier9.
When the weather turns bad, the Gazelle tent is built to last. It’s important to use extra ropes in strong winds to keep it from getting damaged8. The tent is also made to resist flames, meeting CPAI-84 standards, which adds to your safety9.
By choosing the right campsite, following the right steps to set up and take down, and being ready for bad weather, you’ll have a great time with the Gazelle tent789.
Gazelle tent assembly instructions
Setting up your Gazelle tent is easy and can be done in a few steps7. First, take the tent out of its bag and remove the tie strap. Lay it flat on the ground, making sure the poles aren’t twisted or overlapping1.
Then, find the webbing loop on one wall’s center and pull it out to open the wall7. Walk around the tent, pulling each webbing loop to extend all side walls7. This makes the tent stand on its own, ready for the next step.
With the tent standing, go inside and press the roof hub’s bottom to lift the roof7. Be careful because the roof hub and poles are under tension. After the roof is up, your Gazelle camping shelter construction is finished and ready1.

The Gazelle tent setup is easy and quick, turning your campsite into a cozy and safe freestanding tent erection1. Just follow these simple Gazelle tent setup steps to get your shelter up fast. This lets you enjoy the outdoors more781.
Installing the Floor
Before you can enjoy your Gazelle tent, you must install the floor correctly. This step is key for a secure and smooth setup7.
Begin by setting up the tent fully. After the main frame is ready, lay the floor inside loosely. Notice the colored tabs on the tent walls and floor edges1. These tabs help you align the floor perfectly.
Aligning the Floor
Line up the colored tabs on the walls and floor edges1. Start from the center of each wall. Use the tabs to press the hook and loop strips together, securing the floor as you go1. This method ensures a snug, even fit for the Gazelle tent floor.
The Gazelle tent can be packed away with or without the floor, adding convenience1. Always keep the tent fabric clean and dry to keep it in good shape1.
With the floor set up, you’re almost ready for outdoor fun in your Gazelle tent. The colored tabs and hook and loop fasteners make installation easy and quick1. Take your time and follow the steps carefully for a secure, cozy setup every time.
Installing the Rain Fly
Before setting up the rain fly on your Gazelle tent, make sure the tent stands alone with all walls out and the roof down1. This lets you slide the rain fly over the tent roof easily. Make sure the short poles are facing down1.
Begin at a corner by attaching the short poles to the rain fly’s female end and the roof pole’s male end. Do this for all corners1. After connecting the rain fly, go inside and lift the roof panel1. From outside, use plastic hooks to attach the rain fly to the tent’s eye-bolts1.
The Gazelle tent works well with or without the rain fly, adapting to the weather1. This setup keeps you dry in the rain, wind, and other bad weather1.
To take down the rain fly, just unhook it, lower the roof hubs, and slide it off1. This makes your Gazelle tent ready for any weather, perfect for outdoor fun1.
The roof pole connection is key for a strong rain fly setup1. By following these steps, your Gazelle tent stays safe from bad weather. You can enjoy the outdoors, rain or shine1.
Take-Down and Storage
When it’s time to pack up your Gazelle tent, the disassembly process is easy. First, remove all the stakes and tie-down ropes7 that held the tent down. If the rain fly is on, unhook it from the side wall hubs7.
Inside the tent, gently pull the center hub down to collapse the roof. Be careful because it has a lot of tension7. Then, go outside, zip up all doors and windows, and push the side walls in to collapse the tent7.
The tent should now be flat and folded. Fold the corners together, use the tie strap to secure it, and put it back in the carry bag7. Always store the tent clean and dry to avoid mildew or damage7.
The Gazelle Portable Gazebo comes with ground stakes, a storage bag, and tie-down ropes for a secure setup8. The warranty covers defects for up to one year for home use, but only 90 days for business use8. To keep the warranty valid, register the product within 30 days of buying it8.
For storing the gazebo long-term, keep it in a cool, dry place away from rodents8. Following the right steps for collapsing and storing will keep the tent in good shape and make it last longer7.
“Failure to follow assembly, inspection, and use instructions could result in serious injury or death.”10
The Gazelle tent is made with safety first in mind. It meets CPAI-84 standards for flame-resistant fabric10. Always read and follow the instructions, like how to unfold the tent safely, and watch out for pole entanglements10.
The tent has many accessories like ground stakes, a detachable rain fly, floors, and overhead gear lofts, and tie-down ropes10. When setting it up, make sure the site is clear, level, and not under anything overhead for safety in bad weather10.
By taking it down and storing it right, your Gazelle tent will stay in great shape for many camping trips7810.
Conclusion
The Gazelle Tent is easy to set up, taking just 90 seconds11. It’s perfect for both experienced campers and first-timers. This guide makes sure you’re ready for your next outdoor trip quickly.
This tent is strong, roomy, and well-ventilated for a comfy camping trip11. It can handle strong winds and heavy rain, making it great for three seasons11.
Follow the easy steps and tips in this guide to quickly set up your Gazelle Tent12. You’ll have more time to enjoy nature. The Gazelle Tent is a top pick for Gazelle tent setup summary, camping shelter assembly tips, and efficient outdoor shelter construction.
Recommended
- BEST BED TENT TO BLOCK OUT LIGHT FOR SLEEP
- BED TENT FOR TRAVEL: SLEEP COZY ON-THE-GO
- INDOOR BED TENT FOR CAMPING COMFORT & FUN

Meet Noah, the soul behind “Best Inflatable Tent” and a true wanderer at heart. Living the van life, Noah has turned his passion for exploring the great outdoors into a lifestyle, earning his living through organizing group travels that bring people closer to nature. With years of firsthand experience in the wild, Noah’s expertise in selecting and utilizing inflatable tents is unparalleled. Through this blog, he shares his profound knowledge and practical tips to help fellow adventurers find their perfect outdoor shelters. Noah’s commitment to delivering genuine, tested insights has made him a trusted authority in the camping community. Join him on this journey to discover the best inflatable tents that make the great outdoors feel like home.