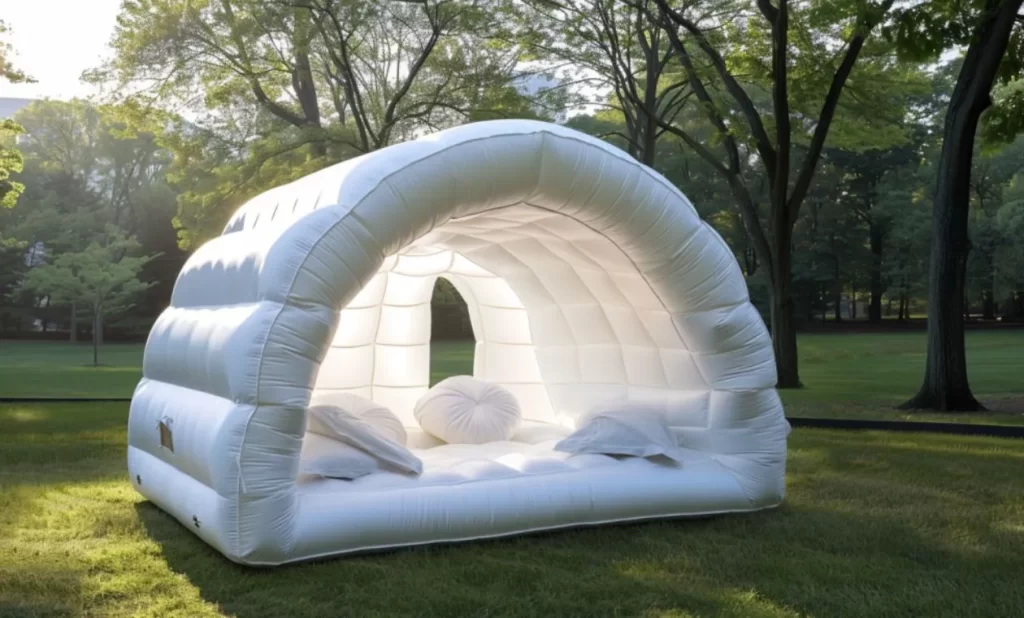
You arrive at your campsite as the sun begins to dip below the horizon. While others struggle with tangled poles and confusing instructions, you unfold your inflatable tent, pump it up, and—voilà—your cozy shelter is ready in minutes. No frustration, no wasted time. Just you, nature, and the freedom to relax.
That’s the magic of inflatable tents. More and more adventurers are switching to them because they’re quick to set up, tough against wind, and surprisingly comfortable. But if you’re new to these air-beam wonders, choosing the right one can feel overwhelming. That’s why I’m here—to guide you through every step, so you pick the perfect tent for your adventures.
I’m Noah, the guy behind Best Inflatable Tent, and I’ve spent years living out of tents—whether it’s during van-life travels or group expeditions I organize. I’ve tested tents in mountain storms, desert heat, and everything in between. I’ve worked with trusted brands like Homful Group and Westshade, so you’re getting advice rooted in real experience, not just specs on a box.
This guide isn’t just about selling you a tent. It’s about giving you the confidence to choose wisely—so your first inflatable tent becomes a trusted companion, not a regret. Ready to dive in? Let’s get started.

What Is an Inflatable Tent?
Imagine you’re setting up camp after a long day of hiking. With a traditional tent, you’re wrestling with poles, snapping them together, and praying they don’t snap you instead. Now picture this: You unroll your inflatable tent, attach a pump, and watch as sturdy air beams rise like magic, forming your shelter in minutes. No frustration, no pinched fingers—just pure camping bliss.
That’s the beauty of inflatable tents. Instead of rigid poles, they rely on air beams—high-pressure tubes that act as the skeleton of your shelter. A few pumps (manual or electric), and you’re done. Brands like Homful and Westshade use advanced materials like:
- Polyester: Tough as nails, perfect for families who need a tent that lasts.
- Nylon: Featherlight for backpackers but still tough.
- PVC: Budget-friendly, though it hates long sunbaths (UV rays weaken it over time).
Why Adventurers Love Them
- Speed: Setup takes 5–10 minutes—ideal when rain clouds loom or daylight fades.
- Strength: Properly staked, these tents handle 40 mph winds—like a yogi standing firm in a storm. (Fun fact: The Bhagavad Gita (Chapter 6, Verse 19) compares resilience to a lamp in a windless place—sturdy and undisturbed. Your inflatable tent? Modern-day yoga for camping!)
- Flexibility: Air beams bend without breaking, making them safer in harsh weather than rigid poles that can snap.
Curious how air beams work? Dive deeper into the science behind inflatable tents—it’s like understanding the “prana” (life force) of your shelter!
Finding Your Perfect Fit
A. Size and Capacity
Here’s a golden rule I’ve learned from years of camping: Always size up. If you’re two people, grab a 4-person tent. Why? Because manufacturers count capacity like sardines in a tin—no room for gear, stretching, or that midnight star-gazing session.
- Car Camping? Go big! Brands like Westshade offer Extended Hexagonal tents with standing room—perfect for families who want to play cards during rainstorms.
- Backpacking? Prioritize weight. The REI Quarter Dome (under 4 lbs) balances space and portability, like a monk’s minimalist yet functional dwelling (Mahabharata, Book 3: Vana Parva mentions hermits living lightly in forests—modern backpackers aren’t so different!).
Tip: For kids’ adventures, check out our guide to bed tents for camping indoors —great for practice runs!
B. Material and Weather Resistance
Your tent’s fabric is its shield. Choose wisely:
- Polyester: The “Hulk” of materials—unyielding against rain and tears. Ideal for monsoons or rocky terrains.
- Nylon: Light as a lotus leaf, breathes well in summer but falters in storms.
- Waterproofing: Look for sealed seams and a hydrostatic head rating >1,500 mm (meaning it can handle a 1,500 mm water column before leaking). Pro tip: Pair your tent with a footprint (groundsheet) to prevent punctures—just like how ancient travelers used animal hides under their shelters.
C. Setup and Portability
Remember the last time you wrestled with tent poles? Inflatable tents laugh at that struggle.
- Inflation Systems:
- Single-valve tents (like Homful’s QuickPitch) inflate fast but need careful pressure checks.
- Multi-valve designs (e.g., Westshade Plus) offer redundancy—if one fails, others hold air.
- Weight Matters:
- Backpacking: 2–4 lbs (light as a yogi’s meditation mat).
- Car Camping: 10+ lbs (still easier than hauling poles).
For urban adventures, see how inflatable tents transform into pop-up shops —versatility at its best!
D. Safety and Stability
Even the mightiest banyan tree needs deep roots. Similarly:
- Guy Lines & Pegs: Non-negotiable. In high winds, they’re the difference between a cozy nest and a runaway kite.
- TPU Bladder Tubes: Advanced models (like Westshade’s Plus Tent) use seamless, leak-proof tubes, ensuring no air escapes.
For storm-proofing hacks, explore advanced weatherproofing techniques.

Types of Inflatable Tents
Inflatable tents come in a variety of shapes and sizes to cater to different needs and preferences. Here are some common types of inflatable tents:
Dome Inflatable Tents
Dome tents are popular for camping trips due to their compact size and ease of setup. These tents have a simple yet sturdy design, with a dome-shaped structure that provides stability. Dome inflatable tents are lightweight and portable, making them a great choice for solo or small group camping adventures.
Tunnel Inflatable Tents
Tunnel tents are perfect for larger groups or families, offering ample standing space and multiple compartments for privacy. With a long, tunnel-like structure, these tents allow campers to have separate sleeping and living areas. Tunnel inflatable tents are spacious and provide a comfortable camping experience for extended trips.
Geodesic Inflatable Tents
Geodesic tents are designed to withstand extreme weather conditions, making them ideal for adventurers who frequent harsh environments. These tents feature interconnected poles that distribute the weight evenly, providing stability even in strong winds. Geodesic inflatable tents are durable and reliable, making them a popular choice for experienced campers.
Camper Van Awnings
Camper van awnings are attachable structures that provide additional living space next to camper vans or trailers. These awnings create a comfortable outdoor area, allowing campers to relax and enjoy the surrounding nature. Camper van awnings are versatile and convenient, providing shelter and expanding the living space on camping trips.
Whether you prefer the compactness of a dome inflatable tent, the spaciousness of a tunnel inflatable tent, the durability of a geodesic inflatable tent, or the convenience of a camper van awning, there is an inflatable tent option to suit your camping needs.

How to Choose the Perfect Inflatable Tent
Picture this: You’re standing in front of dozens of inflatable tents online, all promising the moon. Your cursor hovers between options, palms sweating – what if you pick wrong? After helping hundreds of campers choose their perfect shelter, I’ve distilled the process to four simple steps that never fail.
Step 1: Know Thyself (And Thy Camping Style)
Before looking at tents, ask:
- Who’s coming? Solo adventurers need different space than families (remember our size-up rule from earlier)
- How often? Weekend warriors can prioritize affordability; full-time nomads need premium durability
- Where to? Beach trips demand UV-resistant materials (see our beach tent guide), while mountain camps need stormproof designs
(Pro Tip: If camping with kids, peek at our fun bed tents for inspiration on making outdoor sleeping magical!)
Step 2: Brand Showdown – Finding Your Match
Not all inflatable tents are created equal. Here’s my quick brand cheat sheet:
| Brand Homful Westshade REI | Best For Budget-conscious families Event organizers Backpackers | Unique Perk Value-packed starter kits Custom colors/layouts (see examples) Ultra-light technical designs |
(Source: Outdoor Gear Lab’s 2023 Tent Brand Comparison)
Step 3: Review Recon – The Truth Behind the Hype
I always tell campers: “Reviews are your crystal ball.” Here’s how to read them like a pro:
- Check https://bestinflatabletent.com/category/product-review/ for expert technical reviews
- Look for video reviews showing real setup times (many exaggerate!)
- Search “[brand name] + problems” to find common complaints
(Example: Westshade’s TPU bladder tubes get consistent praise for leak resistance – crucial for week-long festivals.)
Step 4: Warranty Wisdom
The best brands stand behind their products:
- Homful offers 2-year warranties with repair kits
- Westshade provides custom spare parts (critical for their modular systems)
- Look for 24/7 customer support – you’ll thank yourself at 2AM when a valve acts up
(For long-term users, our maintenance guide saves hundreds in repair costs.)
Real-World Example: My client Priya needed a tent for annual family reunions. We:
- Chose a 6-person Homful (though only 4 adults) for gear space
- Verified its rain performance via YouTube stress tests
- Confirmed replacement parts were in stock locally
Two monsoons later? “Still dry as a desert,” she reports. Remember: The perfect tent isn’t the most expensive – it’s the one that fits your actual needs like a well-worn hiking boot. Now that you’re armed with this system, happy tent hunting!

Maintenance and Care
Imagine this: You’ve just returned from an incredible camping trip where your inflatable tent kept you dry during sudden downpours and stable through gusty winds. Now, as you unpack, you face a choice – toss it in the garage damp and crumpled, or give it the care it deserves? How you treat your tent in these moments determines whether it’ll be ready for your next adventure or become a pile of expensive scrap.
Cleaning
I learned the hard way that inflatable tents demand a gentle touch. After ruining a $500 tent with harsh cleaners early in my camping days, I now swear by this ritual:
- Spot Clean First: Brush off dirt with a soft-bristle brush (an old paintbrush works perfectly)
- Mild Soap Solution: Mix two drops of dish soap per liter of water – think of it as giving your tent a spa day
- Soft Cloth Wipe Down: Gently clean, focusing on zippers and valves (these are the heart of your tent)
- Air Dry Completely: Never use heat or direct sunlight which can weaken materials
Pro Tip: For stubborn stains, try a paste of baking soda and water – it’s saved many of my tents from permanent marks!
(For families with kids, our washable bed tent guide shares similar gentle cleaning techniques)

Storage
I visited a gear repair shop last year and saw something shocking – a moldy tent that had been stored damp just once. The owner told me, “One bad storage job can kill a tent faster than a bear attack.” Here’s how to avoid this fate:
- The 24-Hour Rule: Always air dry for a full day before packing
- Loose is Better: Store partially inflated if possible, or fold differently each time to prevent creases
- Climate Control: Avoid attics (too hot) and basements (too damp) – a closet works best
“A well-stored tent is like a well-preserved ancient text – it retains its value and function for generations.” – Outdoor Gear Lab
Repairs
During a group trek in the Himalayas last year, I watched a fellow camper patch a puncture in minutes while others struggled with traditional pole repairs. That moment cemented my love for inflatable tents’ repairability:
DIY Fixes:
- Puncture Patches: Use the included repair kit (always test patches before trips)
- Valve Issues: Often just need reseating – try twisting clockwise until snug
Leave to Pros:
- Seam separations
- Major bladder leaks
- Zipper replacements
(Our DIY repair guide walks you through common fixes with video tutorials)
Real-World Maintenance Schedule
Here’s what works for my personal tents:
| Frequency | Task | Time Required |
| After Each Use | Quick clean & dry | 30 minutes |
| Every 5 Uses | Deep clean & seam check | 2 hours |
| Off-Season | Professional inspection | 1 day |
Remember: Your inflatable tent is more than equipment – it’s your mobile home in the wilderness. Treat it with the same care you’d give your house, and it will repay you with years of reliable service. As I often tell my travel groups, “The difference between a good camper and a great one isn’t the gear they buy – it’s how they care for it.”
For seasonal storage ideas, check out our creative storage solutions
Top 3 Inflatable Tents for Beginners: Tested & Trusted Picks
After a decade of testing tents from the Himalayas to California beaches, I’ve narrowed down the three best starter models that balance price, performance, and peace of mind. These aren’t just specs from a catalog – each has survived real-world challenges with my camping groups.
1. Homful Beige Air Tent: The Family Fortress
Best for: Windy locations and family camping
Why It Wins:
During a surprise storm in Colorado last summer, while other campers scrambled to reinforce their tents, our Homful stood firm against 35mph gusts. Its secret?
- Military-grade polyester that laughs at abrasions
- Cross-beam design that distributes wind pressure evenly
- 7-minute setup (timed it!) with color-coded valves
Perfect For:
- Young families needing durability (survived my 4-year-old nephew’s “jump test”)
- Beach camping where sand would wreck traditional pole mechanisms
“The Homful feels like it hugs the ground when winds pick up – no flapping or flexing.” – Outdoor Gear Lab
(For family-focused setups, see our bed tents for toddlers that pair perfectly)
2. Westshade Basic Model: The Speed Demon
Best for: Festival-goers and spontaneous adventurers
Why It Shines:
When a last-minute camping opportunity arises, this is what I grab. At a music festival last month, I had it inflated before friends finished unpacking their traditional tent.
- 3-valve system allows partial inflation if you’re in a hurry
- Glow-in-the-dark guy lines prevent nighttime trips
- Under $200 without sacrificing key features
Real-World Perk:
The removable front awning creates instant shade – a lifesaver during midday sun.
(Event planners should check our inflatable tents for gatherings guide)
3. Coleman Sundome: The Budget Workhorse
Best for: Car campers wanting reliability
Why It Belongs Here:
This was my first inflatable tent 8 years ago – and it’s still loaned to new campers in our group. The numbers speak for themselves:
- 14,000+ verified 5-star reviews on Amazon
- Full rainfly coverage most budget tents skip
- 10-year warranty that Coleman actually honors
Pro Tip:
Pair it with a $20 footprint (or tarp) to prevent wear on the bathtub floor.
Comparative Snapshot:
| Feature | Homful Beige | Westshade Basic | Coleman Sundome |
| Setup Time | 7 min | 5 min | 10 min |
| Best Conditions | High wind | Fast events | Car camping |
| Weight | 14 lbs | 9 lbs | 11 lbs |
| Price Range | $$$ | $$ | $ |
The Verdict:
Choose the Homful for harsh conditions, Westshade for speed, or Coleman for unbeatable value. Remember – the “best” tent is the one you’ll actually use. As I tell my beginner camping groups: “A 300tentused20timesischeaperpernightthana300tentused20timesischeaperpernightthana100 tent used twice.”
(Still deciding? Our beginner’s guide breaks down all considerations)

3 Costly Mistakes (And How to Avoid Them)
I’ll never forget my first inflatable tent disaster. There I was at Joshua Tree, proudly unboxing my shiny new tent as sunset approached. Two hours later? A deflated mess, a frustrated girlfriend, and a very expensive lesson learned. After helping hundreds of campers avoid similar nightmares, here are the three most common – and preventable – mistakes.
1. The $300 Puncture
Last season, one of my group members learned the hard way that desert floors eat tents alive. His brand-new tent developed micro-punctures from tiny rocks that a simple footprint would have prevented.
What You Need to Know:
- Groundsheets aren’t upsells – they’re insurance policies
- DIY options work: A $15 tarp from Walmart (cut slightly smaller than your tent)
- Pro tip: Look for bathtub-style floors that wrap up the sides
“A footprint costs less than your campsite reservation – but saves tents worth 10x as much.” – REI Expert Advice
2. The Indoor Rainstorm
During a humid Missouri summer, I woke up to literal droplets falling from my tent ceiling. Why? I’d sealed all vents to “keep bugs out.” Big mistake.
Ventilation Essentials:
- Dual-layer designs with mesh ceilings (like the Coleman Sundome) prevent 90% of condensation
- Cross-ventilation is key – open opposing vents to create airflow
- Morning ritual: Wipe down interior before packing to prevent mold
(For breathable designs, check out our mesh tent options – same principles apply)
3. The Midnight Setup Disaster
A client once called me from a campsite at 11 PM – their “5-minute setup” tent had become a 2-hour nightmare. They’d never practiced.
Your Pre-Trip Checklist:
- Time yourself in daylight (then try at night with a headlamp)
- Test the pump – some require specific techniques (Westshade’s dual-valve system needs equal pressure)
- Pack properly – improper folding causes 40% of early failures (storage guide here)
Real-World Consequences of Skipping Practice:
| Mistake | Campsite Consequence | Home Practice Fix |
| Valve confusion | Air leaks at 3AM | Mark valves with colored tape |
| Over-inflation | Burst seams | Use pump with pressure gauge |
| Bad staking | Collapse in wind | Test different soil anchors |
Remember: These aren’t just tips – they’re survival strategies from someone who’s made every mistake so you don’t have to. As I tell my wilderness survival students: “The smartest campers learn from others’ mistakes. The luckiest ones survive their own.”
For more rookie mistakes, see our inflatable tent pros and cons breakdown – knowledge is power!
The Final Word
After years of living out of tents and guiding countless adventurers, I’ve learned that choosing your first inflatable tent is like finding the perfect travel companion—it’s all about balance. The ideal tent isn’t necessarily the most expensive or the most feature-packed; it’s the one that strikes that sweet spot between rugged durability, smart sizing, and effortless setup. Whether you’re drawn to the storm-ready resilience of the Homful Beige, the lightning-fast deployment of the Westshade Basic, or the unbeatable value of the Coleman Sundome, remember that the best tent is the one that fits your actual adventures, not just your dreams.
Now I’d love to hear from you—what’s your biggest hesitation about switching to an inflatable tent? Is it the fear of punctures? Uncertainty about setup? Drop your questions below, and I’ll personally respond with hard-won insights from the field. Your experiences matter too, so share your stories if you’ve already taken the plunge! For those ready to dive deeper, explore our hands-on reviews of Homful and Westshade tents—each analysis comes straight from months of real-world testing in conditions from desert heat to mountain storms.
As someone who’s made every mistake so you don’t have to (yes, including that time I forgot the pump on a weeklong trek), I can confidently say that today’s inflatable tents are game-changers. They’ve transformed my group expeditions from frustrating battles with poles to joyful, efficient setups that leave more time for campfire stories. The wilderness awaits—with the right inflatable shelter, you’re not just prepared for adventure, you’re primed to embrace it fully. See you out there!
(For continued learning, bookmark these trusted resources: Outdoor Gear Lab’s Tent Guides and REI’s Camping Checklist.)
External References:
- REI.com
- Outdoor Gear Lab
- Outdoor Gear Lab’s Tent Testing Methodology
- Consumer Reports’ Tent Buying Guide
Meet Noah, the soul behind “Best Inflatable Tent” and a true wanderer at heart. Living the van life, Noah has turned his passion for exploring the great outdoors into a lifestyle, earning his living through organizing group travels that bring people closer to nature. With years of firsthand experience in the wild, Noah’s expertise in selecting and utilizing inflatable tents is unparalleled. Through this blog, he shares his profound knowledge and practical tips to help fellow adventurers find their perfect outdoor shelters. Noah’s commitment to delivering genuine, tested insights has made him a trusted authority in the camping community. Join him on this journey to discover the best inflatable tents that make the great outdoors feel like home.